Get Started with Chef SaaS
This guide explains how to set up and configure Chef SaaS. For details on how to migrate from AWS OpsWorks, refer to the following page: AWS OpsWorks migration.
Prerequisites
Chef SaaS has the following prerequisites:
You must have a system with Chef Workstation installed.
Chef SaaS Starter Kit (provided by Progress Chef):
- SaaS Environment URL
- SaaS Credentials
- Pivotal PEM file for the initial setup of the environment. This PEM file is temporary and is replaced later.
Add Chef Infra Server in Chef SaaS
Follow these steps in Chef SaaS to add a Chef Infra Server:
Select Infrastructure in the top navigation.
Select Chef Infra Servers in the navigation on the left.
Select Add Chef Infra Server.
Fill out the fields as follows:
Provide a unique name for the Chef Infra Server.
Enter the FQDN by copying the same URL used to connect to Chef SaaS, for example:
saas.example.com.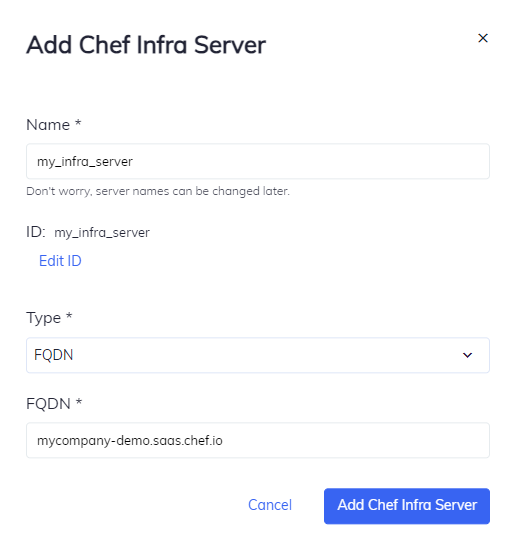
Select Add Chef Infra Server.
Configure Chef Workstation
For details on configuring Chef Workstation, refer to the following sections.
Create a Chef credentials file on your local workstation:
knife configure initThis prompts you with several questions:
- Enter the Chef Infra Server URL provided in the Starter Kit, for example:
saas.example.com. - For the existing API username or client_name, enter the superuser account provided in the Chef SaaS Starter Kit.
This creates a credentials file in the
~/.chefdirectory with contents similar to the following:[default] client_name - 'pivotal' client_key = '/home/admin/.chef/pivotal.pem' chef_server_url - 'https://saas.example.com'- Enter the Chef Infra Server URL provided in the Starter Kit, for example:
Copy the
pivotal.pemfile from the Chef SaaS Starter Kit to the~/.chefdirectory.This gives you the proper credentials to connect to Chef SaaS in the following steps.
Create an organization using the
knife org createcommand. This organization acts as a top-level entity for role-based access control.knife org create <ORGANIZATION_NAME> "<ORGANIZATION_FULL_NAME>"Replace:
<ORGANIZATION_NAME>with the user’s organization name.<ORGANIZATION_FULL_NAME>with the organization’s full name.
This returns a private key for the organization’s validator client.
Create a new user associated with the new organization and use the credentials file:
knife user create <USERNAME> --email <EMAIL> --password <PASSWORD>Replace:
<USERNAME>with the user’s username.<EMAIL>with the user’s e-mail address.<PASSWORD>with the user’s password.
Copy the new
<FILE_NAME>.pemfile created with this command to the~/.chefdirectory before updating the credentials file later in this document.Add the new user to the organization using the
knife org usercommand:knife org user add <ORGANIZATION_NAME> <USERNAME>In the above code, replace:
<ORGANIZATION_NAME>with user’s organization name.<USERNAME>with the user’s username.
Open the credentials file in the
~/.chefdirectory and update the following values:client_nameto the new account created.client_keyto the new PEM file that was created.chef_server_urlto include the new organization.
An example of the credentials in the
~/.chefdirectory is as follows:[default] client_name - 'CLIENT_NAME' client_key = '/home/admin/.chef/<USER_NAME>.pem' chef_server_url - 'https://saas-example.com'
Configure Chef Saas
The following steps add the organization to Chef SaaS. Connect to the URL provided by Progress Chef and log in with the admin account credentials:
Select Infrastructure in the top navigation.
Select Chef Infra Servers in the navigation on the left.
Select the Chef Infra Server created previously.
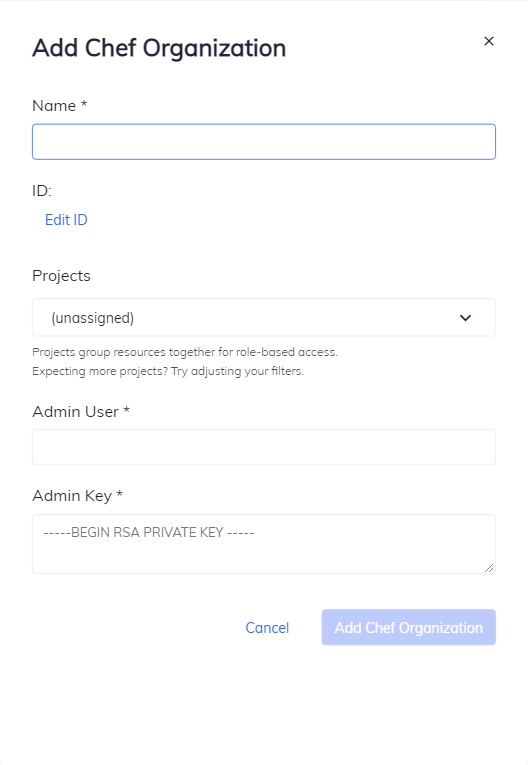
Select Add Chef Organization and:
- Provide the Name of the organization created using knife.
- For Admin User, enter the new account created using knife.
- For Admin Key, paste the contents of the new PEM file created with the user account.
- Select Add Chef Organization.
Verify the SSL configuration
Chef SaaS uses public certificates to ensure a secure connection to the service. To eliminate connection issues, verify the SSL connection and the certificate.
Verify the connection with the new organization:
knife ssl check
Verify the client connection
Finally, verify a successful connection to the new organization:
knife client listThis returns a list of Infra Client nodes and workstations that are registered with a Chef Infra Server.